Importing inventory items
Updated on January 26th, 2022
We actually don’t require you to setup special spreadsheets using predetermined fields, we let you use your existing csv data and tell SalesBinder which of your columns should go into which field in your account.
Here’s how it works:
Save your spreadsheet as a CSV file:
Using any popular spreadsheet program (ie. Microsoft Excel or Apple Numbers) you can save your spreadsheets as CSV files. You’ll find this option either under “Save As…” or “Export” in the File menu. The only thing you need to prepare is that you save each of your different categories of inventory into separate files. We require this because in SalesBinder you can create different “Custom Fields” on a per category basis so each of your categories can store different types of data.
Tip: If you’re starting your inventory list from scratch or would like to use a simple template, feel free to download our sample CSV file here.
Import your data:
- Go to “Inventory List” and click on “Tools” then “Import New Inventory Items”
- Select which category this import should go into
- Browse your hard drive for your saved CSV file and click “Next Step”
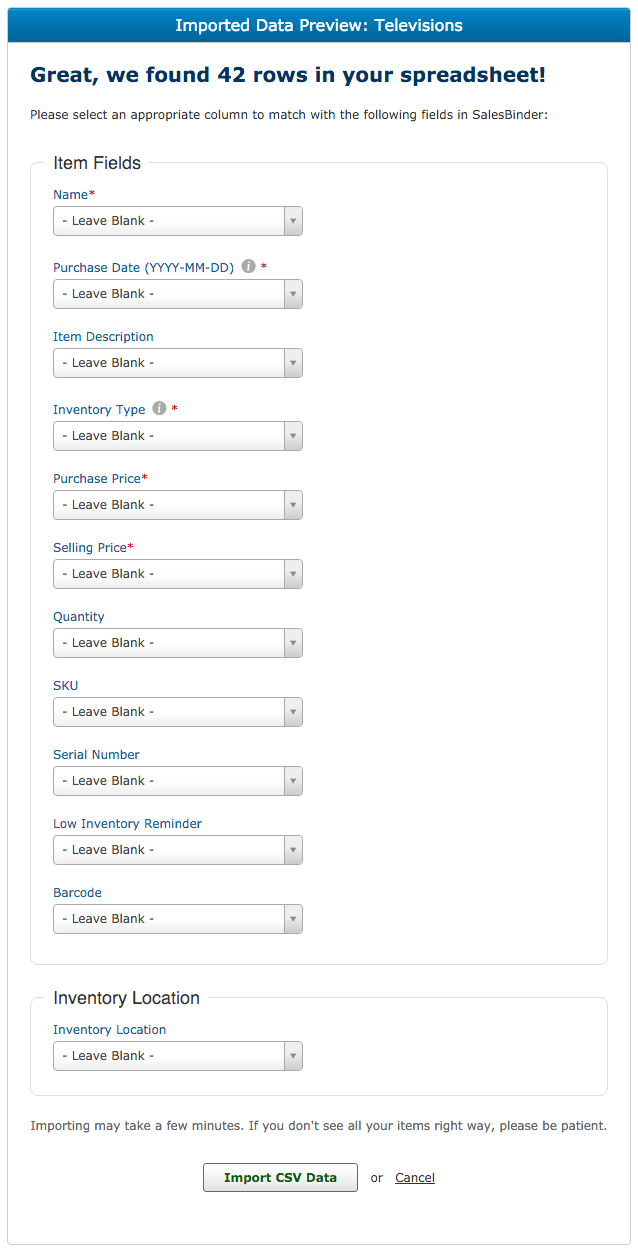
- Now you get to match up your fields and import your data (it should look like the screen below)
Tip: The fields should be fairly self explanatory, however you’ll want to pay special attention to the “Inventory Type” field. This tells SalesBinder whether or not your inventory items will be considered “Unique” or “Quantity Item”. You can set them all to a specific type (most commonly “Quantity Items”) or you can have it refer to a column in your uploaded spreadsheet.

Note: If you’re importing a fairly large list of inventory items it may take a few minutes for the import process to complete in the background.
That’s it. If you’ve followed these steps correctly, you’re done!