
Create a label template
- Go to Settings → Product Labels.
- Click New Template and choose a starting layout.
- Enter a Template Name that’s easy to recognize, such as “Retail Price Labels” or “Warehouse Labels.”
- Set the Label Width and Label Height to match your label stock. You can use inches or millimetres.
- Choose the contents and appearance of your label.
- Click Save Template.
You can save multiple templates for different label sizes or purposes. Enable Use as the default template to have your preferred template selected automatically when printing.
If you don’t have access to these settings, ask your account administrator to set up a template.
Choose what appears on your labels
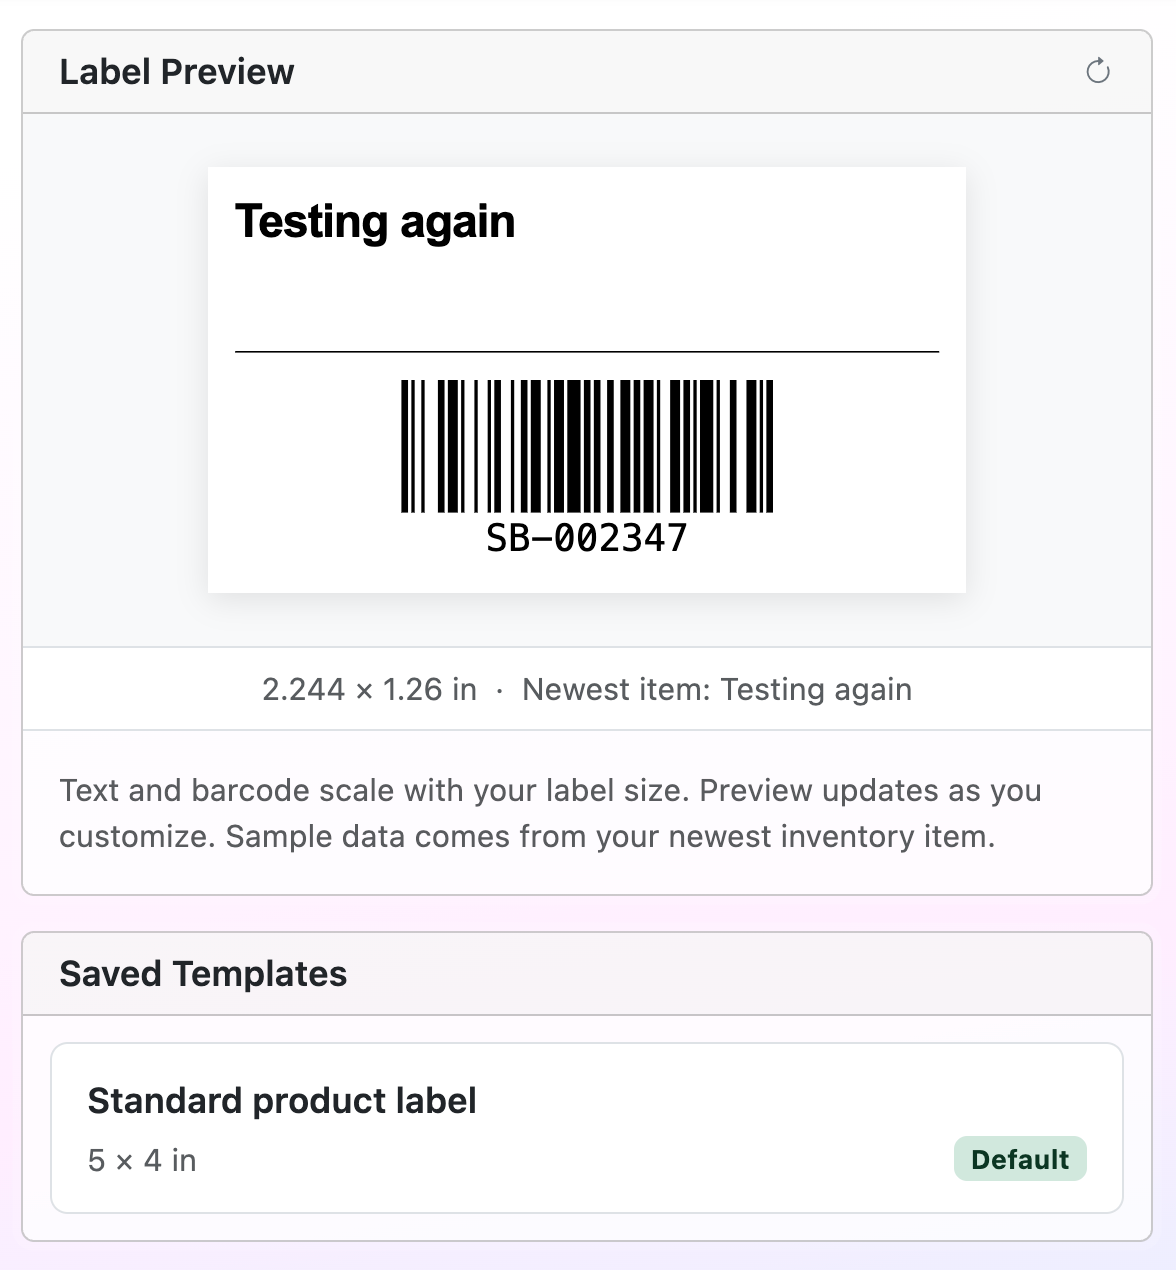
Every label includes the product barcode, using the barcode already saved for the item or variation.
You can add up to six additional fields, including:
- Product name and variation attributes, such as size or colour.
- SKU and item number.
- Selling price before tax.
- Business name.
- Location and zone.
- Custom fields.
- Fixed text, such as “Handle with care.”
Use Add Field to include more information and the arrow controls to adjust the field order within the layout’s groups.
For smaller labels, keeping the contents brief helps make the information easier to read.
Customize the appearance
Choose from three label designs:
- Product: A layout with structured product details.
- Retail: A layout that makes the selling price stand out.
- Compact: A simple layout for essential information.
You can also adjust spacing, text size, alignment, and whether the barcode appears above or below the text.
Optional settings let you include your business logo, show the readable barcode value beneath the bars, and display field names such as “SKU” or “Location.” The business logo uses the image saved in Logo Setup and prints in monochrome.
The Label Preview updates as you customize, helping you check the layout before saving.
Print labels from an inventory item
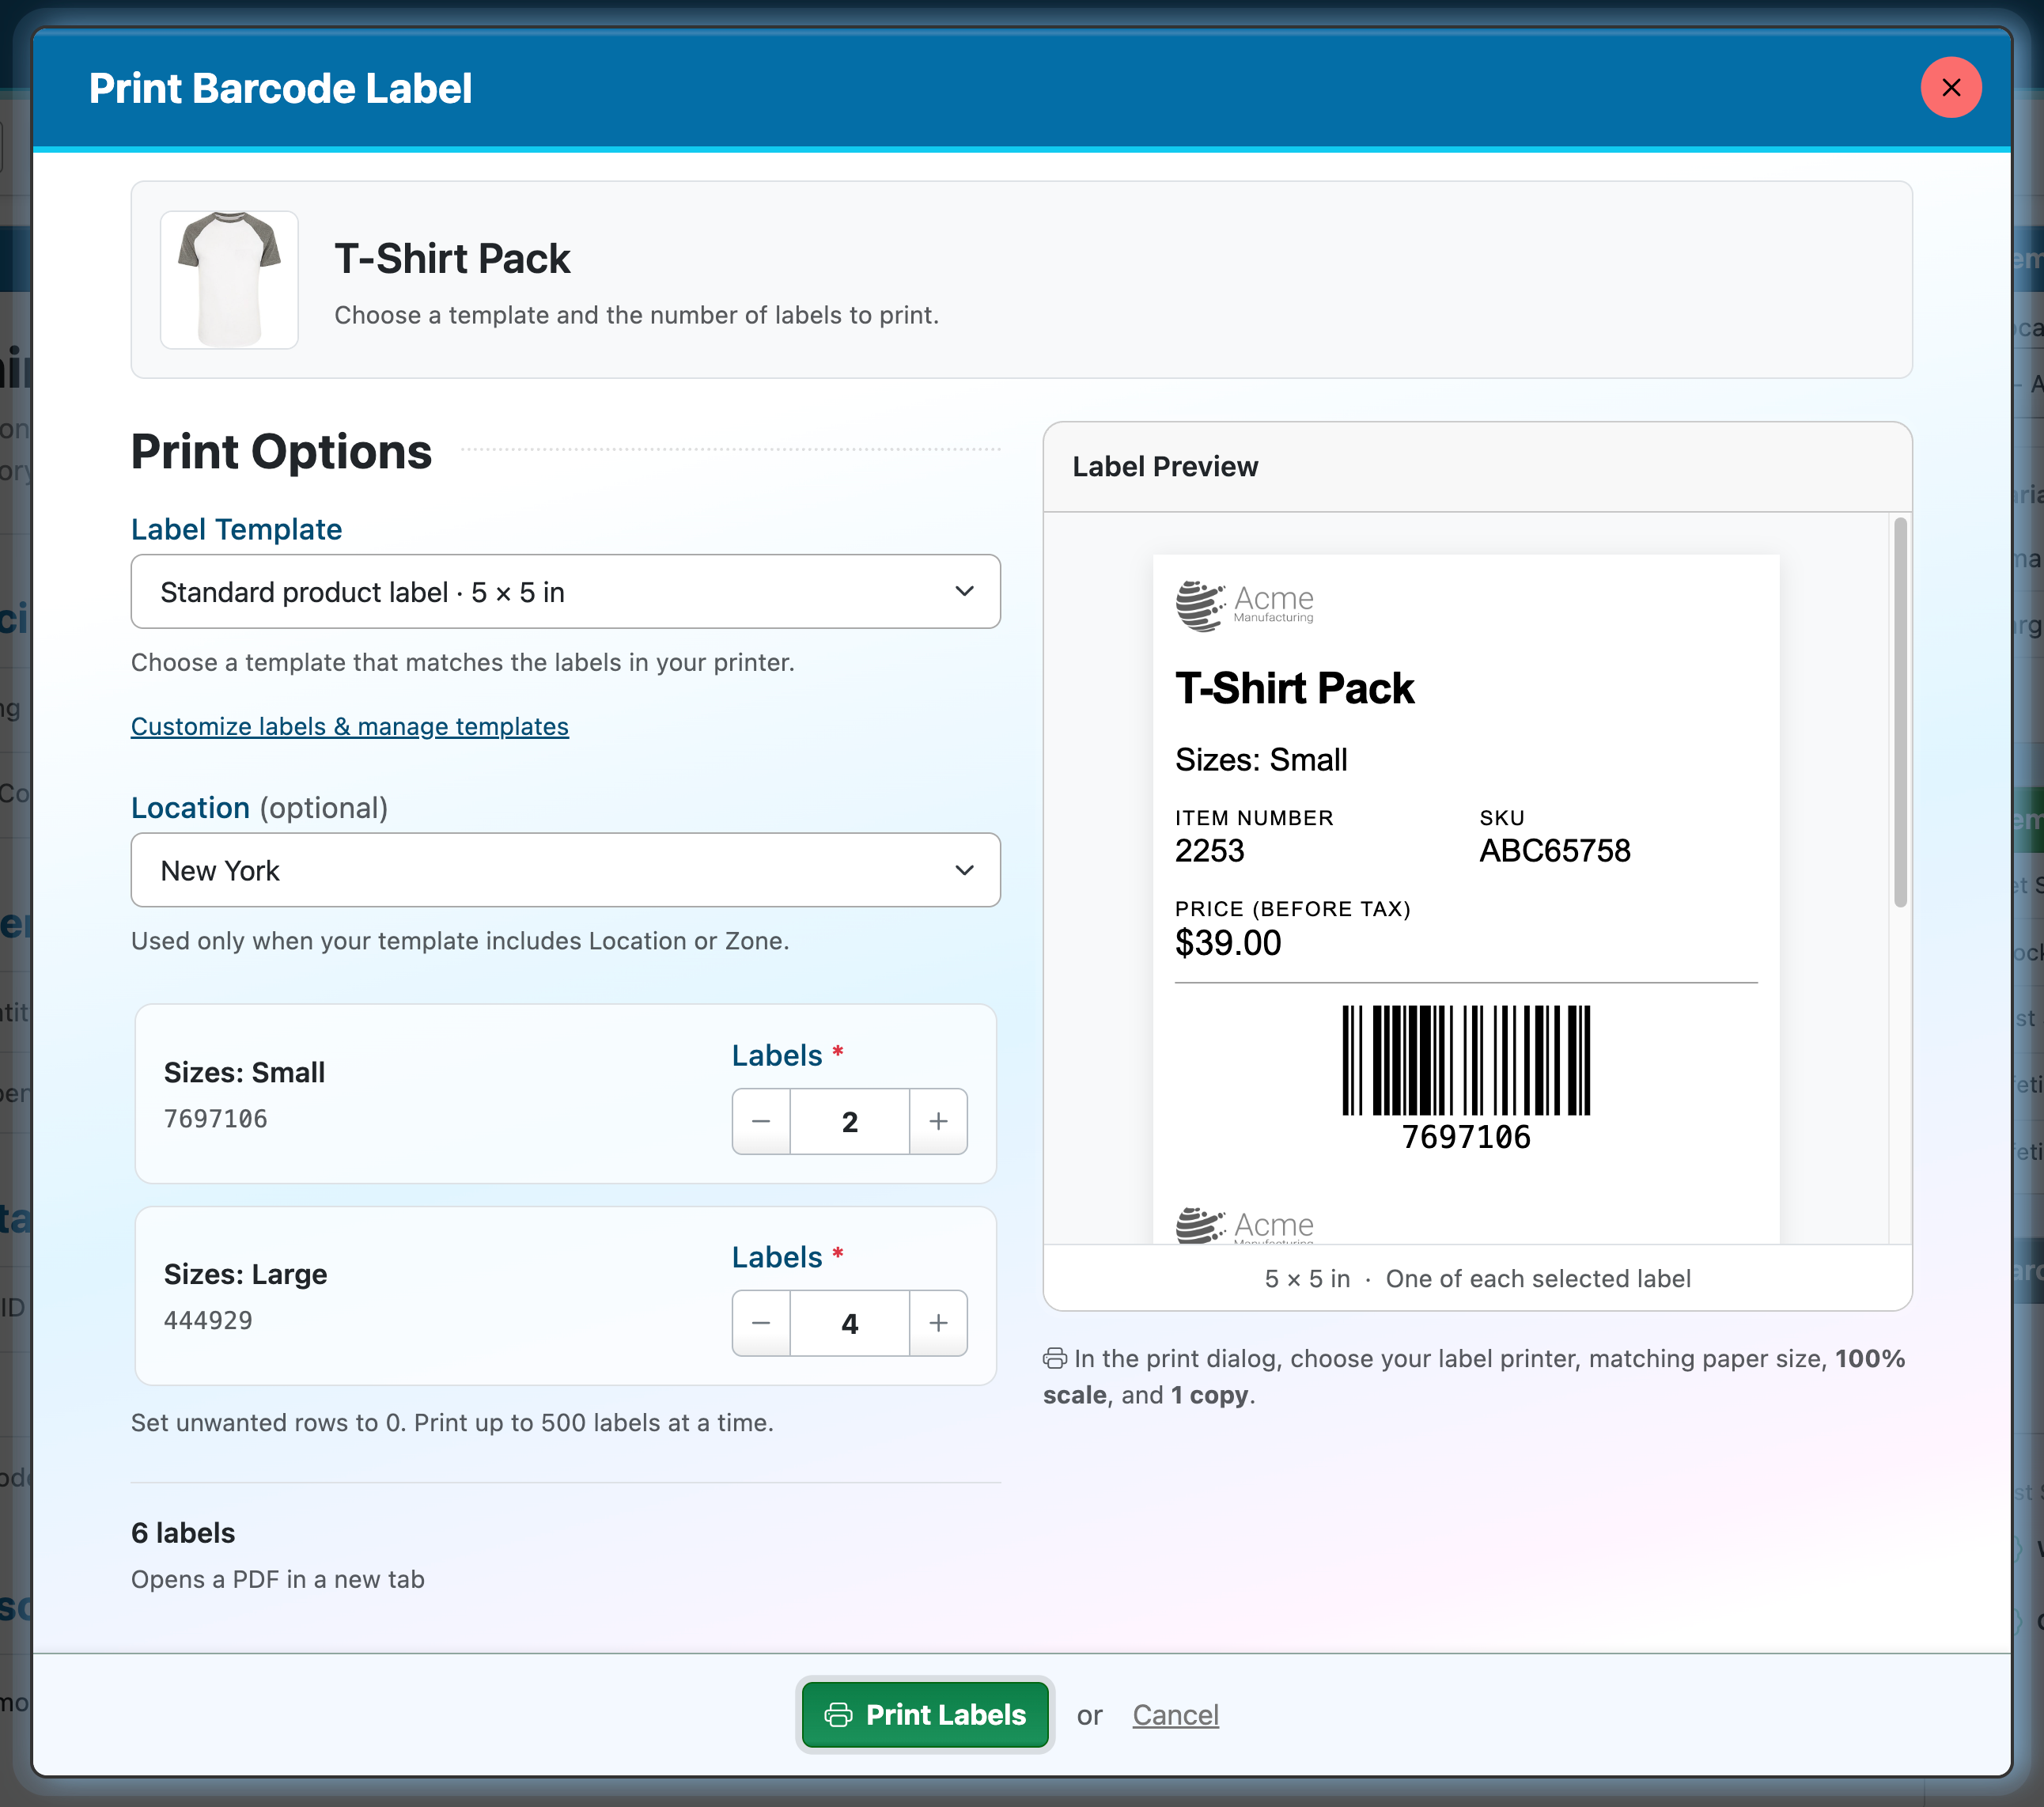
- Open the item’s inventory details page.
- Choose Options → Print Barcode Label.
- Select a Label Template that matches the labels in your printer.
- Enter the Number of Labels you want to print.
- Choose a location if you want to include location details.
- Review the Label Preview, then click Print Labels.
SalesBinder opens a PDF in a new tab, ready to print. You can print up to 500 labels at a time.
Make sure the item has a saved barcode before printing.
Print labels for product variations
If your item has variations, such as different sizes or colours, you can choose a separate label quantity for each variation.
For example, you could print 10 labels for a small blue shirt and 15 labels for a medium blue shirt in the same print job. Set any variations you don’t need to 0.
Each variation uses its own saved barcode, so make sure the variations you select have barcodes before printing.
Use the right printer settings
When printing the PDF, select:
- Your label printer.
- A paper size that matches your template and label stock.
- 100% scale.
- 1 copy.
The PDF already contains the number of labels you requested, so increasing the copy count will print extra sets.
It’s a good idea to print one test label when using a new template. Check that the text fits and the barcode scans correctly before printing a larger batch.