Xero Accounting – Integration Setup
Updated on March 1st, 2022
Connecting Xero Accounting to your SalesBinder account is easy and only requires two steps.
Step 1.
Authorize SalesBinder to connect with Xero Accounting:
Under the Settings section (top right corner), simply click on “Manage Integrations” and click on the “Not Connected” grey box referring to Xero Accounting. This will load the connection screen where you’ll see a “Connect to Xero” button like this. Click that button and it will open a secure Xero webpage and ask you to login to your Xero account.
Step 2.
Configure the integration by mapping your data to Xero:
Now that your Xero account is connected to SalesBinder you need to map where your data should go. It’s important that you make a selection for every option on this screen in order to ensure things are going into the correct place within your Xero account. If you’re unsure of which accounts to use, you may need to run it past your accountant to be on the safe side.
Required Configuration Options:
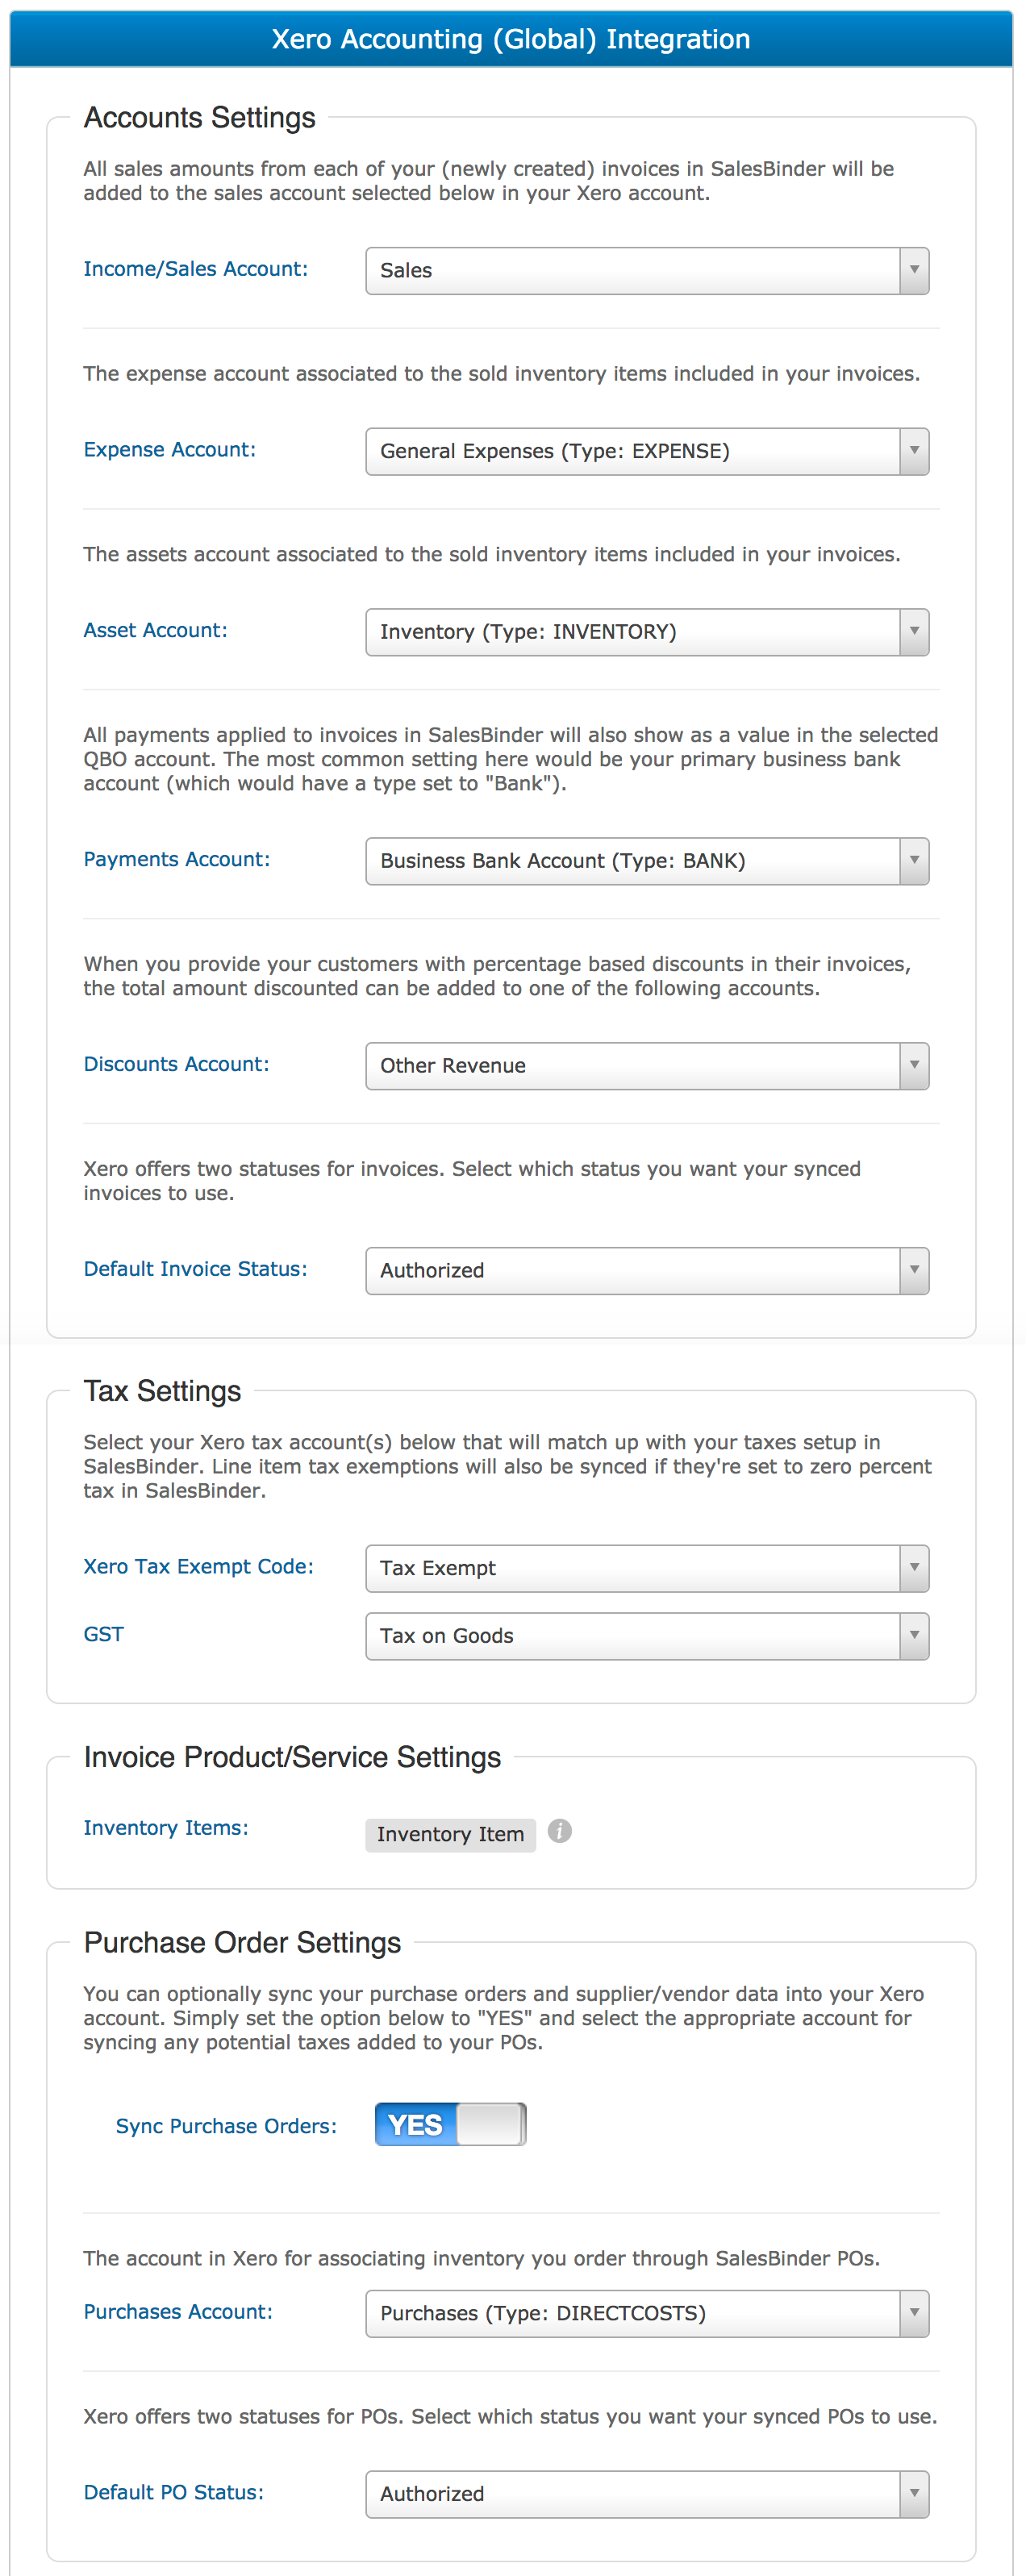
Income/Sales Account
- All sales amounts from each of your (newly created) invoices in SalesBinder will be added to the sales account selected below in your Xero account.
- Expense Account
- The expense account associated to the sold inventory items included in your invoices.
- Asset Account
- The assets account associated to the sold inventory items included in your invoices.
- Payments Account
- When an account is selected here, all payments applied to synced invoices in SalesBinder will also show up in your selected Xero account. The most common setting here would be your primary business bank account (which would have a type set to “Bank”).
- Discounts Account
- When you provide your customers with percentage based discounts in their invoices, the total amount discounted will be added to the selected account in Xero.
- Taxes
- Select your Xero tax code and tax rate account(s) below that will match up with your taxes setup in SalesBinder. Line item tax exemptions will also be synced if they’re set to zero percent tax in SalesBinder.
- Invoice Product/Service Settings
- Inventory Items are added to Xero invoices as a generic “Inventory Item” with all of it’s details displayed in the Description field. Service Items need to be mapped to one of your “Services” items in Xero.
- Purchase Orders
- Optionally enable Purchase Orders to sync into your Xero account as well. Simply set the option to YES and select the correct account for potential taxes in PO’s to sync into.
- Enable Integration
- Set to YES to enable the integration, set to NO to disable it.
Recommendation:
Once you enable the Xero Accounting integration, you’re ready to start testing it out. Since this integration doesn’t sync historical invoices there’s no risk of accidentally modifying things in Xero, no data will sync immediately.
We suggest creating a test invoice and then reviewing how it integrated with your Xero account (it should show up in as little as a few seconds). If you’ve decided to sync payments, maybe give that a try too. Once you’ve confirmed everything is syncing correctly you can simply reset the SalesBinder invoice (to remove the test payment from both systems) and then delete the SalesBinder invoice from your invoice list (it should automatically get deleted in Xero too).